4. QuickViewer – SQVI
- Simplest method
- Mainly for ad-hoc look-ups
- Accessible „only“ for user
- QuickViewer naming is recommend like : Z followed by 4-digit User followed by increasing number, e.g. Z139801
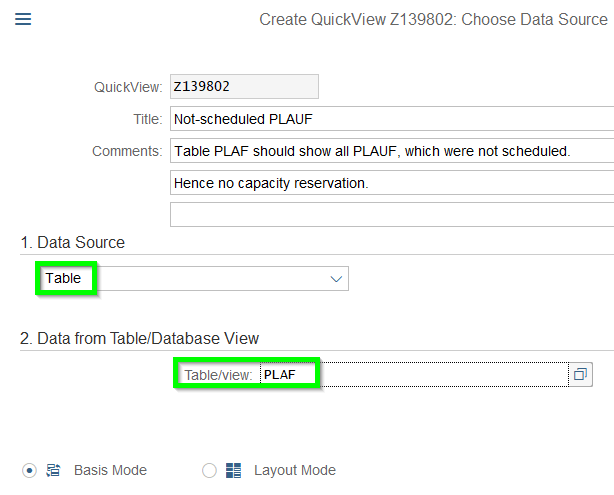
A) Select Data Source

B) Select Selection- and Layout fields
Firstly find a certain field (e.g. BEDID) via the green marked buttons, so left structure being built up:
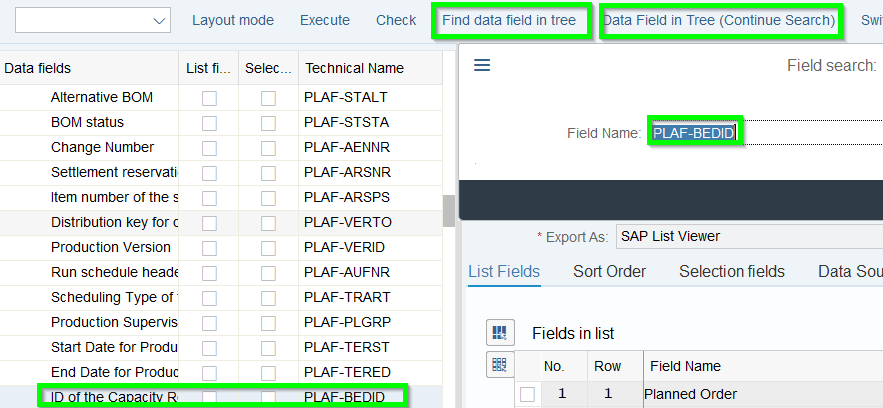
If you tick „List“ this field will be listed after you run the query. If you tick „Select“ this field will be displayed as selection field on the starting screen of the query.

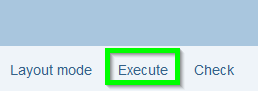
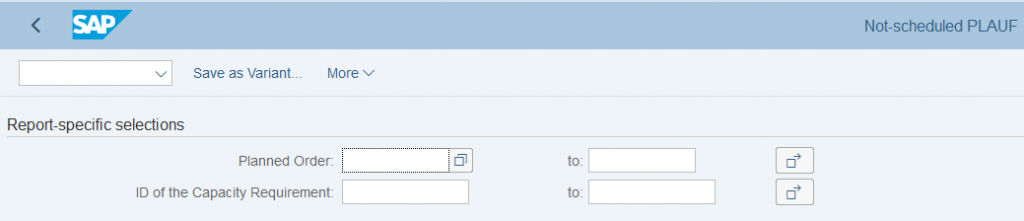
Run „Excecute“ to check query:
After return check out „Layout mode“:

In the Layout mode you have some more options to level-up your query:
5. SAP-Query
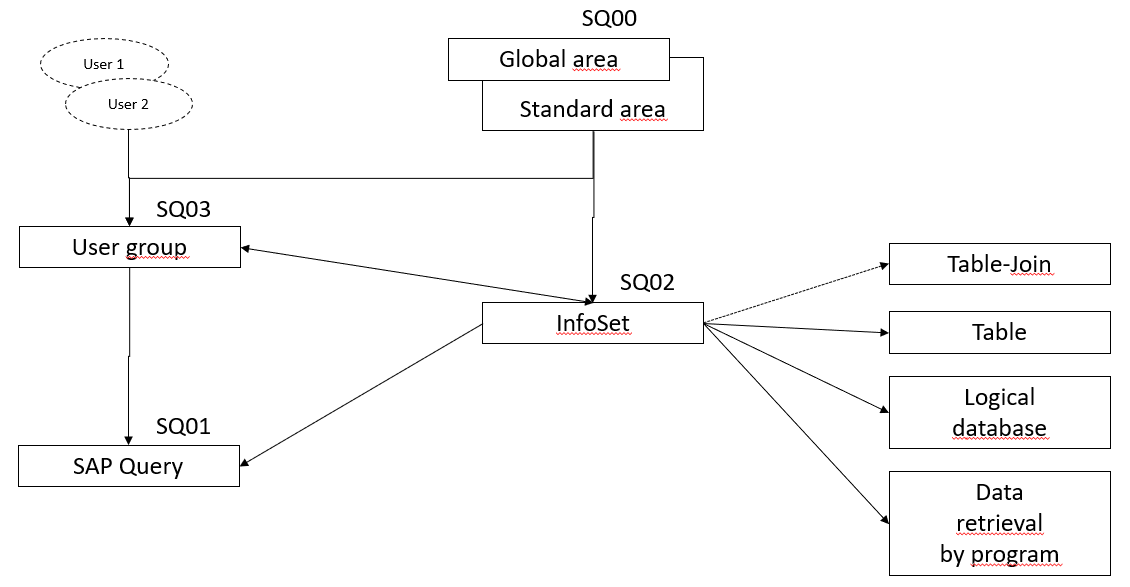
To understand the 4 SAP Query Objects it is important to understand the relation of the transactions:
If you create the Query in „Standard Area“ no transport is necessary but it is only accessible in a specific client.
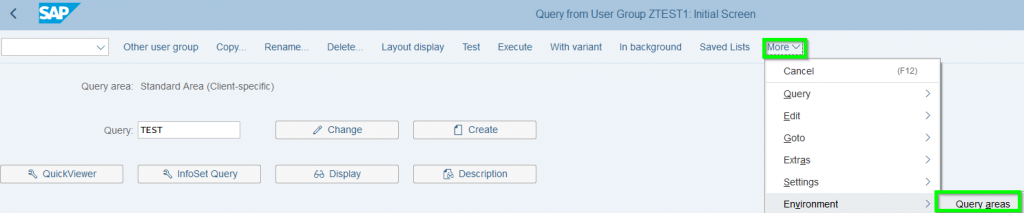
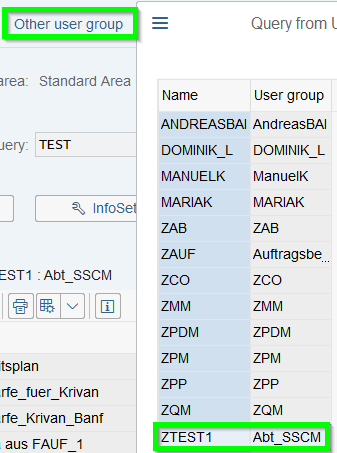
Then you have to select the relevant „User group“:
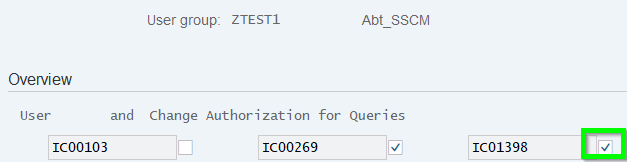
The User group can be created via SQ03. Max. 130 user groups can be created. It is recommended to start user group with Z (=customer specific area). The length is max. 12 alpha-numeric digits. By setting a tick the specific user has the rights to make changes:
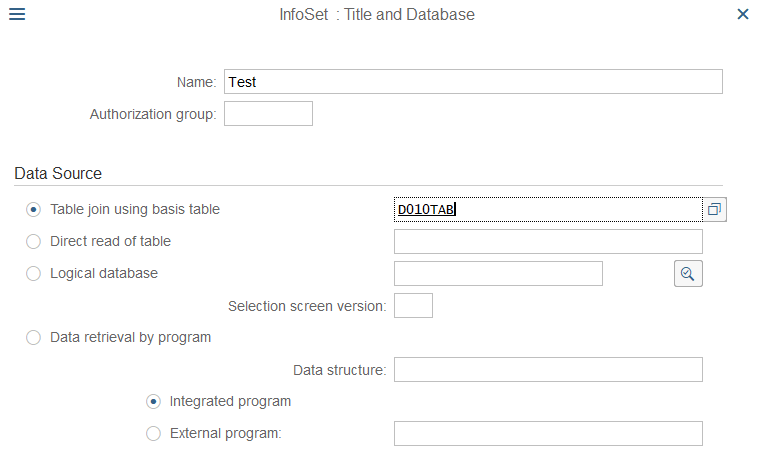
Next step the InfoSet via transaction SQ02 needs to be created:

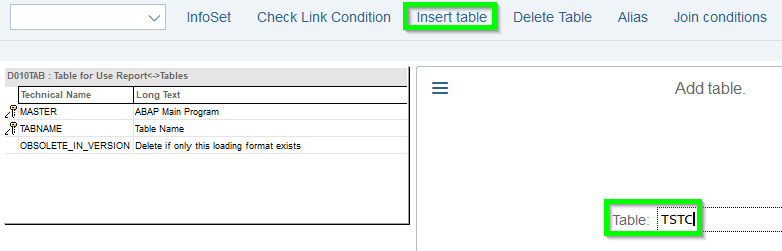
Then you can add a second or more further tables:
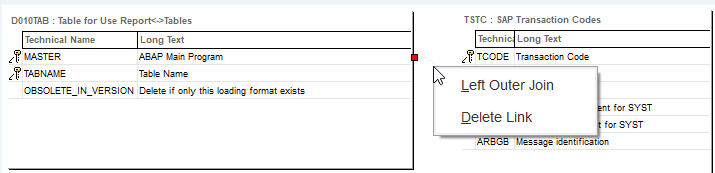
In most cases the program will automatically link the tables but the logic is following (user has to verify if linkage is correct):
- Same field length
- Same field attribute like numeric

Alternatively you can delete the linkage and create it manually. Explanation „left outer join“ follows later:
Then push „InfoSet“ and continue:
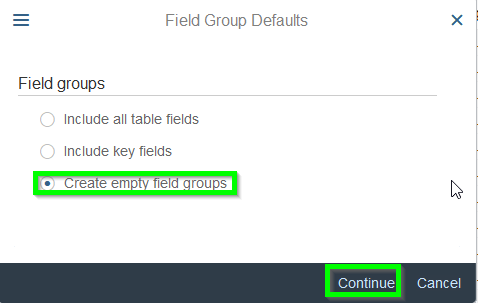
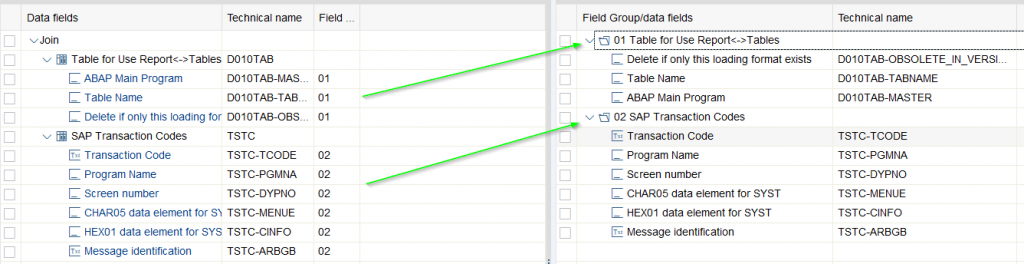
Via Drag & Drop move Data fields to Field Group:
Then push „Generate“ button and „Save“. InfoSet „Test“ is created and saved. Status „Green Ticking Field“
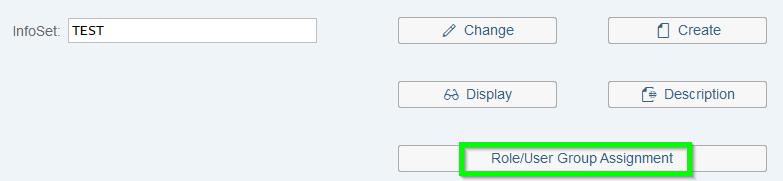
Next step assign new InfoSet „Test“ a certain User group via SQ02.
Now the final step create query via SQ01:

Then assign the relevant InfoSet. It is recommended to give Query and InfoSet same name. So if later adjustments need to be done both items can be found easilier.
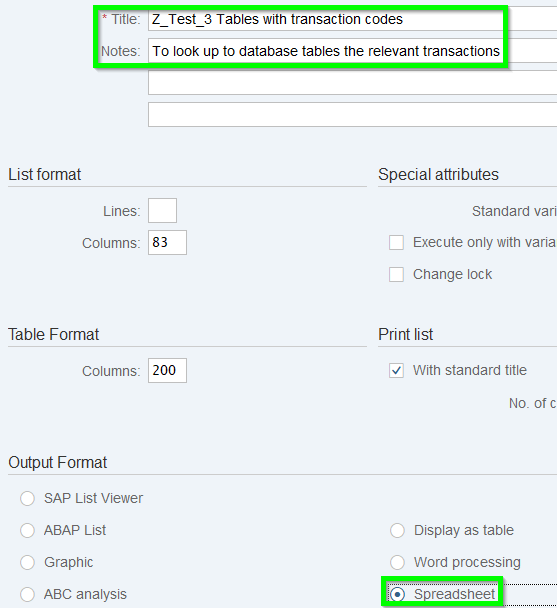
Add Title and further description and select Spreadsheet as output Format:
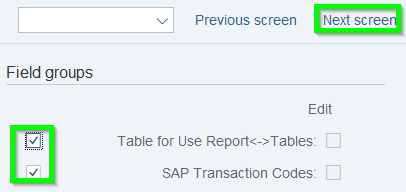
Then select „Next screen“ and select all „Field groups“ and continue with „Next screen“:
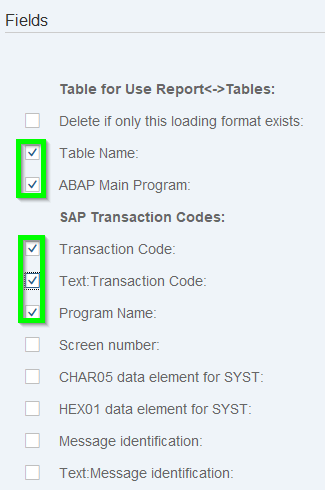
Then select all or relevant fields and again „Next screen“:
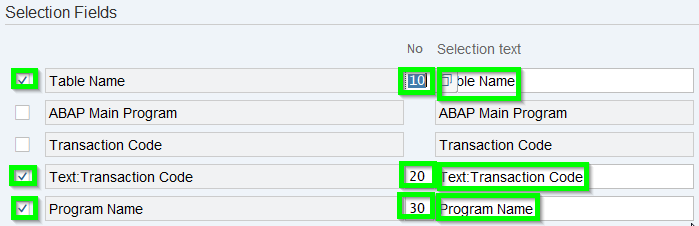
Now you create the Selection Fields in the order the initial screen of the query should be built-up. The No. sorts the fields. It is recommend to use 5-digit steps for later adjustments. In addition the Selection text can be individually changed:
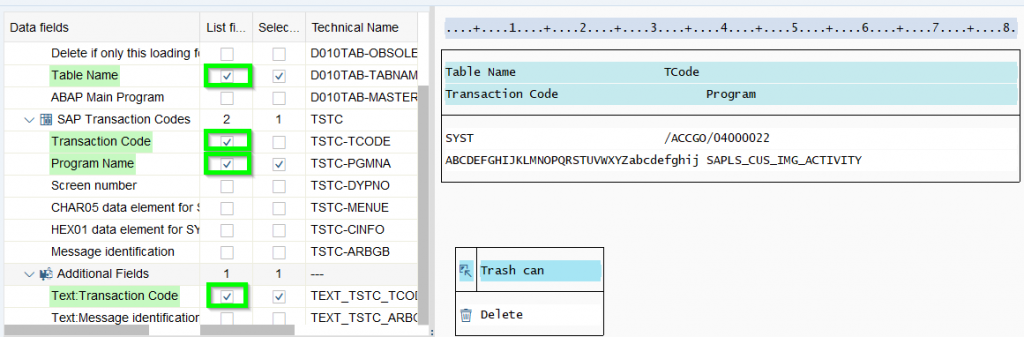
Final push „Basic List“ button. Now you create the result list in the order how you tick each field according column „List…“:
Then test query via „Test“ button. If everything is ok, „Save“ it.

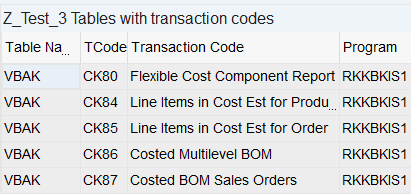
Now you can retrieve all the transactions where table VBAK being used:
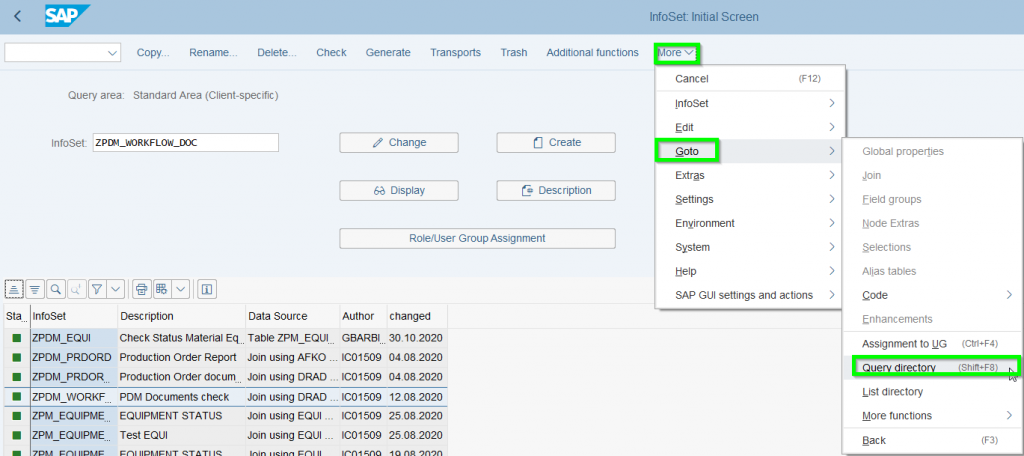
If you like to know how Querys/ InfoSets being built-up enter SQ02 by following path to Query Directory:
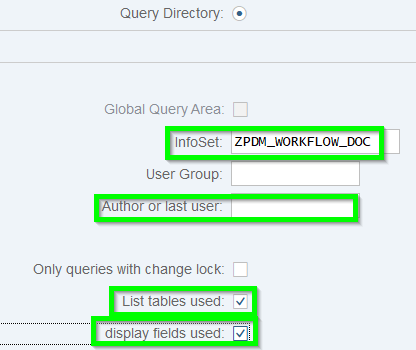
Here several selction fields given. Do not forget to tick „List tables used“ and „display fields used“:
Another alternative is to use the description (same applies to SQ00/ SQ01):

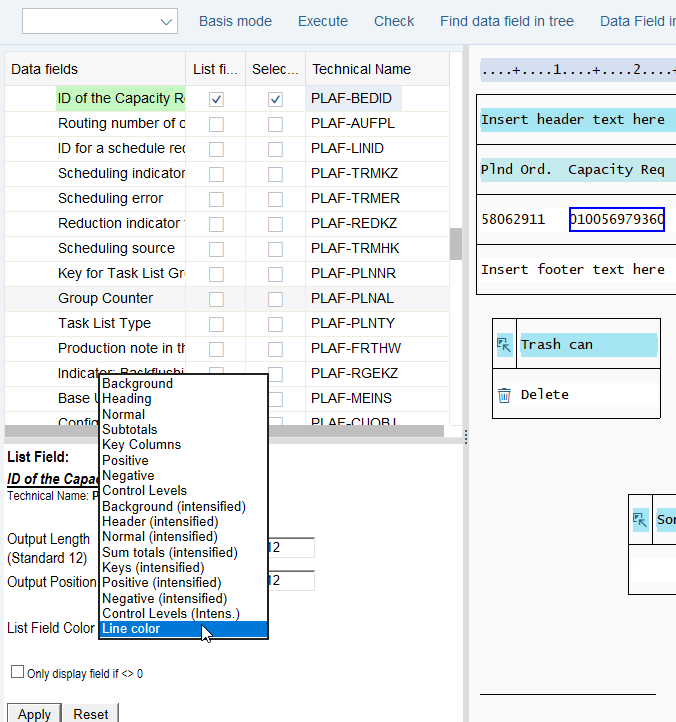
Similiar like Microsoft all Deletions being moved into „Trash“ and can be retrieved or final be deleted:
